In this tutorial, we’ll be looking at how to set up an infinite scrolling interaction for your single post template using Bricks Builder for WordPress. While we’ll be using Bricks for this tutorial, the broad technique can be applied for any decent page builder out there.
This interaction is quite popular with content-heavy websites like magazines, news and blogs because it offers a seamless user experience between posts thus increasing views and time spent on the website. It should however be noted that it can also bring some UX drawbacks. Like any infinite scrolling experience, it can make the footer and any other elements at the bottom almost impossible to reach. There’s also the fact that users have no direct control in whether to load the next post or not. But I’ll also show you a potential workaround to get the best of both worlds.
How it works
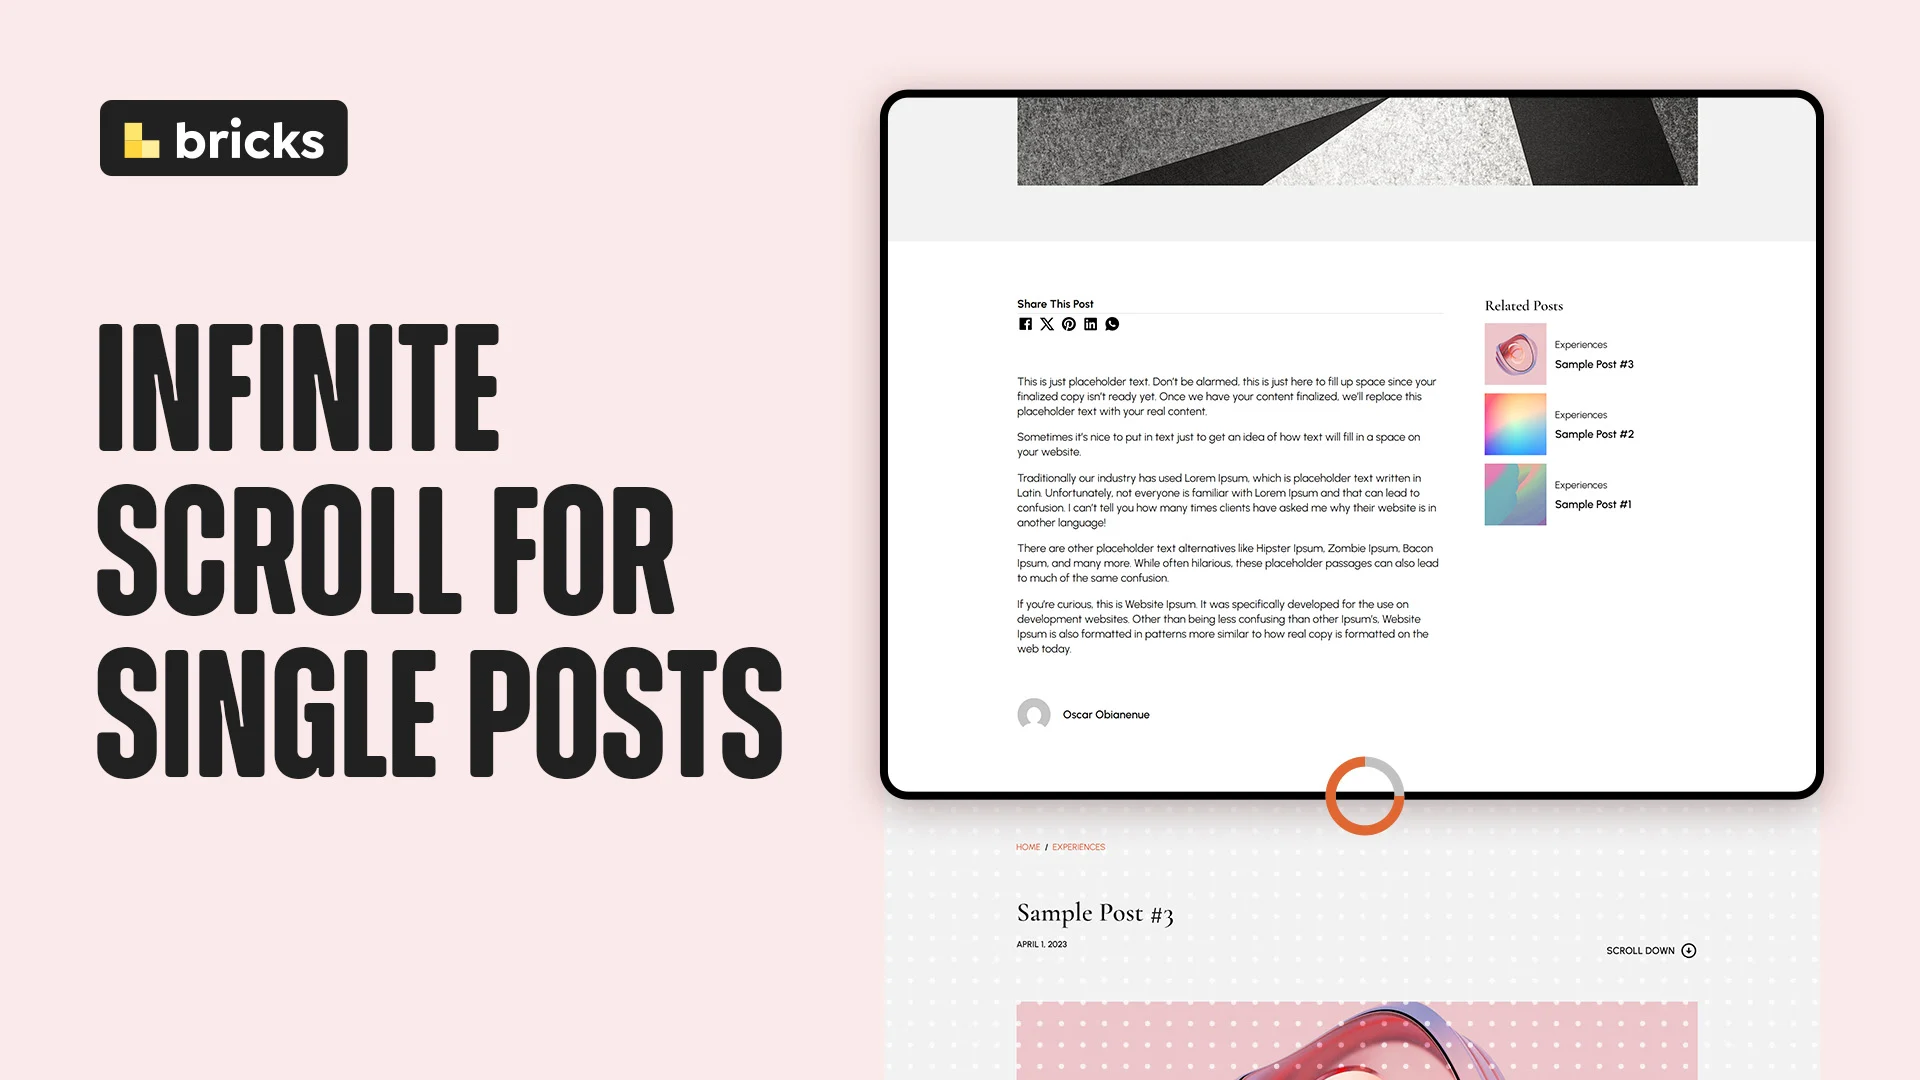
As we scroll towards the bottom of the page, you’ll notice that once we reach a certain distance from the bottom of the page, the next post automatically fades in (which is really sleek), and the link in the browser’s URL bar gets updated corresponding to the link for the new post.
If we scroll back up, you see that at some point, it dynamically reverts to the previous post’s link. This makes it possible for users to still share the current post in view.
If we keep scrolling until the last post, we finally get an end of content message and no more posts are loaded.
Now let’s get into it.
Template Setup
First of all, you must set up your single post template. The most important thing is to wrap everything with an article element. You can do that in Bricks by placing everything in a div or block element and changing the html tag to article. It’s also good semantics.

Now in this article element, I’ll add two attributes: data-post-id and data-permalink which I will assign the corresponding {post_id} and {post_url} Bricks dynamic tags.


Adding the PHP for Next Post API
Next, copy and paste the PHP code below into your preferred code snippet manager. You can find the code in the accompanying blog post which I have linked in the description.
PHP code
<?php
// Redirect template setup for single posts
function custom_template_redirect()
{
    if (is_single()) {
        global $wp_query;
        $post_id = get_queried_object_id();
        $wp_query->setup_postdata(get_post($post_id));
    }
}
add_action("template_redirect", "custom_template_redirect");

// Register REST API endpoint
function register_next_post_api()
{
    register_rest_route("custom/v1", "/next-post", [
        "methods" => "GET",
        "callback" => "get_next_post_content",
    ]);
}
add_action("rest_api_init", "register_next_post_api");

// Fetch next adjacent post content
function get_next_post_content($request)
{
    $current_post_id = intval($request->get_param("current_post_id"));

    // Backup original globals
    global $post, $wp_query;
    $original_post = $post;
    $original_wp_query = $wp_query;

    // Get next post
    $post = get_post($current_post_id);
    setup_postdata($post);
    $next_post = get_adjacent_post(false, "", true);
    wp_reset_postdata();

    if (!$next_post) {
        return new WP_REST_Response(["error" => "No more posts"], 404);
    }

    // Set up query for next post
    $wp_query = new WP_Query([
        "p" => $next_post->ID,
        "post_type" => "post",
    ]);

    // Set critical context flags
    $wp_query->is_single = true;
    $wp_query->is_singular = true;
    $wp_query->queried_object = $next_post;
    $wp_query->queried_object_id = $next_post->ID;

    // Set global post context
    $post = $next_post;
    setup_postdata($post);

    // Render Bricks template with your template ID
    $content = do_shortcode('[bricks_template id="81"]');

    // Capture output
    $response_data = [
        "content" => $content,
        "permalink" => get_permalink($post->ID),
        "postId" => $post->ID,
    ];

    // Restore original context
    wp_reset_postdata();
    $wp_query = $original_wp_query;
    $post = $original_post;

    return new WP_REST_Response($response_data, 200);
}
What this code basically does is to create a custom REST API endpoint that retrieves and renders the content, permalink, and ID for the next post. It then uses that information to layout the next post using a Bricks template which we’ve specified. Speaking of the bricks template, the only thing you need to update in this code is this line here:
$content = do_shortcode('[bricks_template id="81"]');Make sure to change the template ID to the ID of your single post template which you can find in the Bricks Template Manager. In my case, it is 81
Adding the code
Now back in our single post template, I’ll add a code element. Be sure to place it at the bottom of the article element. Do not place it outside or it won’t work.
Paste the HTML and CSS for the Loading spinner. You can style it however you want
Spinner HTML & CSS
<div id="loading-spinner" style="display: none; position: fixed; top: 50%; left: 50%; transform: translate(-50%, -50%); z-index: 9999;">
    <div class="spinner"></div>
</div>
/* Loading Spinner */
.spinner {
border: 8px solid #db5b38;
border-top: 8px solid #000;
border-radius: 50%;
width: 50px;
height: 50px;
animation: spin 1s linear infinite;
}
@keyframes spin {
from {
transform: rotate(0deg);
}
to {
transform: rotate(360deg);
}
}Article Fade-in CSS
/* Fade-In Animation */
.fade-in {
    opacity: 0;
    animation: fadeIn 1s ease-in forwards;
}

@keyframes fadeIn {
    from {
        opacity: 0;
    }
    to {
        opacity: 1;
    }
}
Finally, paste the JavaScript
JavaScript
document.addEventListener('DOMContentLoaded', function() {
    // ========================
    // DEVELOPER CONFIGURATION
    // ========================
    const config = {
        scrollThreshold: 300, // How close (in px) to page bottom before loading next post
        urlUpdateBuffer: 200, // How far from top (in px) to update URL to current article
        cacheAjax: true // true = allow browser caching, false = always fetch fresh (no cache)
    };

    // ========================
    // CORE IMPLEMENTATION
    // ========================
    let loading = false;
    let currentArticleId = null;
    let noMorePosts = false;

    const spinner = document.getElementById('loading-spinner');
    const mainContainer = document.querySelector('main');

    // --- Accessibility: ARIA Live Region for announcements ---
    let liveRegion = document.getElementById('aria-live-region');
    if (!liveRegion) {
        liveRegion = document.createElement('div');
        liveRegion.id = 'aria-live-region';
        liveRegion.setAttribute('role', 'status');
        liveRegion.setAttribute('aria-live', 'polite');
        liveRegion.style.position = 'absolute';
        liveRegion.style.left = '-9999px';
        liveRegion.style.width = '1px';
        liveRegion.style.height = '1px';
        liveRegion.style.overflow = 'hidden';
        document.body.appendChild(liveRegion);
    }

    function announce(message) {
        liveRegion.textContent = message;
    }

    // End-of-content message setup
    const endOfContentMessage = document.createElement('div');
    endOfContentMessage.textContent = "You've reached the end of the articles.";
    endOfContentMessage.setAttribute('aria-live', 'polite');
    endOfContentMessage.setAttribute('role', 'status');
    Object.assign(endOfContentMessage.style, {
        textAlign: 'center',
        padding: '20px 0',
        fontSize: '1.1em',
        color: '#666',
        display: 'none'
    });
    mainContainer.insertAdjacentElement('afterend', endOfContentMessage);

    // Throttle function
    function throttle(callback, delay) {
        let shouldWait = false;
        return (...args) => {
            if (shouldWait) return;
            callback(...args);
            shouldWait = true;
            setTimeout(() => {
                shouldWait = false;
            }, delay);
        };
    }

    // Show/hide loading spinner and announce loading state
    function showLoading() {
        if (spinner) spinner.style.display = 'block';
        announce("Loading next article...");
    }

    function hideLoading() {
        if (spinner) spinner.style.display = 'none';
        announce(""); // Clear loading message
    }

    // Append new article content, manage focus and announce
    function appendPost(content) {
        const tempDiv = document.createElement('div');
        tempDiv.innerHTML = content;
        const newArticle = tempDiv.firstElementChild;
        if (newArticle) {
            newArticle.classList.add('fade-in');
            mainContainer.appendChild(newArticle);
            newArticle.scrollIntoView({
                behavior: 'smooth',
                block: 'start'
            });

            // Accessibility: Move focus to heading or article
            let heading = newArticle.querySelector('h1, h2, h3, h4, h5, h6');
            if (heading) {
                heading.setAttribute('tabindex', '-1');
                heading.focus();
            } else {
                newArticle.setAttribute('tabindex', '-1');
                newArticle.focus();
            }

            // Accessibility: Announce new content
            announce("New article loaded.");
        }
    }

    // URL update
    function updateURL() {
        const articles = document.querySelectorAll('main article');
        const viewportHeight = window.innerHeight;
        const buffer = config.urlUpdateBuffer;

        let currentArticle = null;

        articles.forEach(article => {
            const rect = article.getBoundingClientRect();
            if (rect.top <= buffer && rect.bottom >= buffer) {
                currentArticle = article;
            }
        });

        if (!currentArticle && articles.length > 0) {
            for (let i = articles.length - 1; i >= 0; i--) {
                const rect = articles[i].getBoundingClientRect();
                if (rect.top < viewportHeight && rect.bottom > 0) {
                    currentArticle = articles[i];
                    break;
                }
            }
        }

        if (currentArticle) {
            const newArticleId = currentArticle.dataset.postId;
            if (newArticleId && newArticleId !== currentArticleId) {
                const permalink = currentArticle.dataset.permalink;
                if (permalink) {
                    history.replaceState({}, '', permalink);
                    currentArticleId = newArticleId;
                }
            }
        }
    }

    // Throttled function to load the next adjacent post
    const throttledLoadNextPost = throttle(() => {
        if (loading || noMorePosts) return;

        loading = true;
        showLoading();

        const lastArticle = document.querySelector('main article:last-child');
        if (!lastArticle) {
            loading = false;
            hideLoading();
            return;
        }
        const lastPostId = lastArticle.dataset.postId;

        let fetchUrl = `/wp-json/custom/v1/next-post?current_post_id=${lastPostId}`;
        if (!config.cacheAjax) {
            fetchUrl += `&cache=${Date.now()}`;
        }

        fetch(fetchUrl)
            .then(response => {
                if (!response.ok) {
                    throw new Error(`Fetch failed with status: ${response.status}`);
                }
                return response.json();
            })
            .then(data => {
                if (data && data.content) {
                    appendPost(data.content);
                    loading = false;
                    hideLoading();
                } else {
                    throw new Error('No content received, assuming end of posts.');
                }
            })
            .catch(error => {
                loading = false;
                hideLoading();
                noMorePosts = true;
                endOfContentMessage.style.display = 'block';
                announce("You have reached the end of the articles.");
            });
    }, 500);

    // Define the scroll handler function
    function handleScroll() {
        updateURL();
        const nearBottom = (window.innerHeight + window.scrollY) >= document.documentElement.scrollHeight - config.scrollThreshold;
        if (nearBottom) {
            throttledLoadNextPost();
        }
    }

    window.addEventListener('scroll', handleScroll);

    // Optional: Initial check in case the first page load is already shorter than the viewport + threshold
    setTimeout(() => {
        if (!noMorePosts && (window.innerHeight >= document.documentElement.scrollHeight - config.scrollThreshold)) {
            throttledLoadNextPost();
        }
    }, 100);
});
The code is responsible for the infinite scrolling interaction by dynamically loading and appending the next article when the user is about 400px from the bottom of the page. It also updates the browser’s URL based on the visible article, and displays the end-of-content message when there are no more articles to load.
I’ve also included some settings so you can control the most important behaviors.
The scrollThreshold lets you set the distance in pixels from the bottom of the page beyond which we can trigger the loader.
The urlUpdateBuffer lets you adjust the distance of the current article from the top of the viewport for the link in the URL bar to change.
Finally, cacheAjax determines whether the browser should use its cached version of the AJAX request or fetch a fresh, uncached version every time. If set to true, caching is allowed, meaning the browser can reuse previously fetched data to improve performance. This setting also allows us to work around a problem where changes we make to the template do not immediately reflect in subsequent articles.
So if for example I change the position of the social sharing block to just above the article and preview, you can see that the change reflects on the first post, but not in subsequent posts. To fix this, I recommend setting cacheAjax to false while you’re still in development. It will force a fresh, uncached version every time at the cost of performance of course. Remember to set it back to true , then Empty Cache and Hard Reload or press CTRL/CMD F5 on your keyboard to avoid stale content.
Known Issues
A known issue with this setup is that the default share button element in Bricks will only works in the first post. For subsequent posts, it loses the context and will share the AJAX request link instead of the current article as demonstrated when I click on the WhatsApp share icon. So in order to work around this problem, we have to create our own share buttons and build the share links manually for each social platform. You just need to replace the URL part of the social share link with the Bricks {post_url} dynamic tag. I have some of the most common ones listed below:
Facebook: https://www.facebook.com/sharer/sharer.php?u={post_url}
X: https://x.com/intent/tweet?url={post_url}
LinkedIn: https://www.linkedin.com/shareArticle?mini=true&url={post_url}
Pinterest: http://www.pinterest.com/pin/create/button/?url={post_url}
WhatsApp: https://api.whatsapp.com/send?text={post_url}
You can also copy and paste the JSON for a share-card I already made for Bricks. This should give you a good starting point. Just be sure to replace the social icons with your own since those might not carry over.
Share Card
{"content":[{"id":"xepdcu","name":"block","parent":"xmoqkc","children":["jepopp","rjsvpq","emxcoe","yjmrzo","xurqrd"],"settings":{"_cssGlobalClasses":["247knd"],"tag":"ul"},"label":"Social Share"},{"id":"jepopp","name":"div","parent":"xepdcu","children":["gwvcgv"],"settings":{"tag":"li","_cssGlobalClasses":["k9e9cg"]},"label":"Item-FB"},{"id":"gwvcgv","name":"icon","parent":"jepopp","children":[],"settings":{"icon":{"library":"svg","svg":{"id":3444,"filename":"facebook-box-fill.svg","url":"https://tutorials.lightspuncreative.com/wp-content/uploads/facebook-box-fill.svg"}},"_cssGlobalClasses":["0bphun"],"link":{"type":"external","url":"https://www.facebook.com/sharer/sharer.php?u={post_url}","newTab":true,"ariaLabel":"Share to Facebook."}},"label":"Icon","themeStyles":{}},{"id":"rjsvpq","name":"div","parent":"xepdcu","children":["jxmkai"],"settings":{"tag":"li","_cssGlobalClasses":["k9e9cg"]},"label":"Item-X"},{"id":"jxmkai","name":"icon","parent":"rjsvpq","children":[],"settings":{"icon":{"library":"svg","svg":{"id":3448,"filename":"twitter-x-line.svg","url":"https://tutorials.lightspuncreative.com/wp-content/uploads/twitter-x-line.svg"}},"_cssGlobalClasses":["0bphun"],"link":{"type":"external","url":"https://x.com/intent/tweet?url={post_url}","newTab":true,"ariaLabel":"Share to X."}},"label":"Icon","themeStyles":{}},{"id":"emxcoe","name":"div","parent":"xepdcu","children":["hwspjn"],"settings":{"tag":"li","_cssGlobalClasses":["k9e9cg"]},"label":"Item-Pin"},{"id":"hwspjn","name":"icon","parent":"emxcoe","children":[],"settings":{"icon":{"library":"svg","svg":{"id":3447,"filename":"pinterest-fill.svg","url":"https://tutorials.lightspuncreative.com/wp-content/uploads/pinterest-fill.svg"}},"_cssGlobalClasses":["0bphun"],"link":{"type":"external","url":"http://www.pinterest.com/pin/create/button/?url={post_url}","newTab":true,"ariaLabel":"Share to Pinterest."}},"label":"Icon","themeStyles":{}},{"id":"yjmrzo","name":"div","parent":"xepdcu","children":["qyyemw"],"settings":{"tag":"li","_cssGlobalClasses":["k9e9cg"]},"label":"Item-LI"},{"id":"qyyemw","name":"icon","parent":"yjmrzo","children":[],"settings":{"icon":{"library":"svg","svg":{"id":3446,"filename":"linkedin-box-fill.svg","url":"https://tutorials.lightspuncreative.com/wp-content/uploads/linkedin-box-fill.svg"}},"_cssGlobalClasses":["0bphun"],"link":{"type":"external","url":"https://www.linkedin.com/shareArticle?mini=true&url={post_url}","newTab":true,"ariaLabel":"Share to LinkedIn."}},"label":"Icon","themeStyles":{}},{"id":"xurqrd","name":"div","parent":"xepdcu","children":["lveddt"],"settings":{"tag":"li","_cssGlobalClasses":["k9e9cg"]},"label":"Item-LI"},{"id":"lveddt","name":"icon","parent":"xurqrd","children":[],"settings":{"icon":{"library":"svg","svg":{"id":3450,"filename":"whatsapp-fill.svg","url":"https://tutorials.lightspuncreative.com/wp-content/uploads/whatsapp-fill.svg"}},"_cssGlobalClasses":["0bphun"],"link":{"type":"external","url":"https://api.whatsapp.com/send?text={post_url}","newTab":true,"ariaLabel":"Share to WhatsApp."}},"label":"Icon","themeStyles":{}}],"source":"bricksCopiedElements","sourceUrl":"https://tutorials.lightspuncreative.com","version":"1.12.4","globalClasses":[{"id":"247knd","name":"share-card__icon-list","settings":{"_direction":"row","_rowGap":"0.8rem","_alignItems":"center","_justifyContent":"flex-start","_columnGap":"0.8rem","_cssCustom":".share-card__icon-list {\n list-style-type: none;\n padding-inline-start: 0;\n}"},"modified":1742405097,"user_id":1,"_exists":false},{"id":"k9e9cg","name":"share-card__icon-list-item","settings":{"_cssCustom":".share-card__icon-list-item a {\n display: flex;\n align-items: center;\n justify-items: center;\n}"},"_exists":false},{"id":"0bphun","name":"share-card__icon","settings":{"_cssCustom":".share-card__icon {\n transition-property: color;\n\ttransition-duration: 0.3s;\n\ttransition-timing-function: ease;\n width: 1.5em;\n color: #000;\n}\n\n.share-card__icon:hover {\n color: var(--primary-hover);\n}"},"_exists":false,"modified":1746009856,"user_id":1}],"globalElements":[]}So far, we should have it working perfectly with no further trouble which is all well and good.
Addressing UX issues
One of the main UX drawbacks of this interaction is the fact that users do not have direct control over the interaction. It just loads more articles as they scroll towards the bottom. This can be frustrating if the user wants to access content in the footer. So what if we could add a load more button that the user can click to load the next post at will; or even better, what if we could make the load more button appear only after a set number of articles have been loaded? This way, we can get the best of both worlds: automatic loading and user control.
So, I’ll add a “Load More” button at the bottom of the article. Remember to set the semantic tag to button otherwise it may not work. Then copy the button’s ID or set your own ID. If you have Bricks set to “Add element ID as needed”, you might need to set your own ID for the button under the CSS styles.

Next, I’ll paste a new version of the JavaScript. This is a more robust version of the code which you can get by purchasing on my template store. I have it linked in the description. When you purchase, you support this channel and encourage more useful tutorials like this one.
You’ll immediately notice that we have a few extra settings here.
loadButtonId allows us to input the ID of our load more button. This is how the code recognizes the button on the page. So users can click to load the next article via AJAX. If you decide to work without a load more button, the script will automatically load new articles when the user scrolls beyond the scrollThreshold, as usual.
postsPerBatch allows us to set the number of posts to automatically load by scroll before the button appears. So if we set it to 3, the next 3 articles will automatically load when the user hits the scrollThreshold. But on the third article, the Load more button appears and the AJAX loading is suspended until the user clicks on the button to load the next batch of articles.
I haven’t seen this kind of implementation anywhere else but I think its a great solution in this case. Let me know what you think in the comments.
Changelog
- Updated the JavaScript to be more accessible using aria-live